Install the Power BI Connector
The Power BI Connector is a SysTrack Kit, named SysTrack PowerBI. You must import this Kit before you can complete the steps in the following sections.
IMPORTANT: You can download the Kit on the DEX and Kit Downloads page.
Run the Automation for the Connector
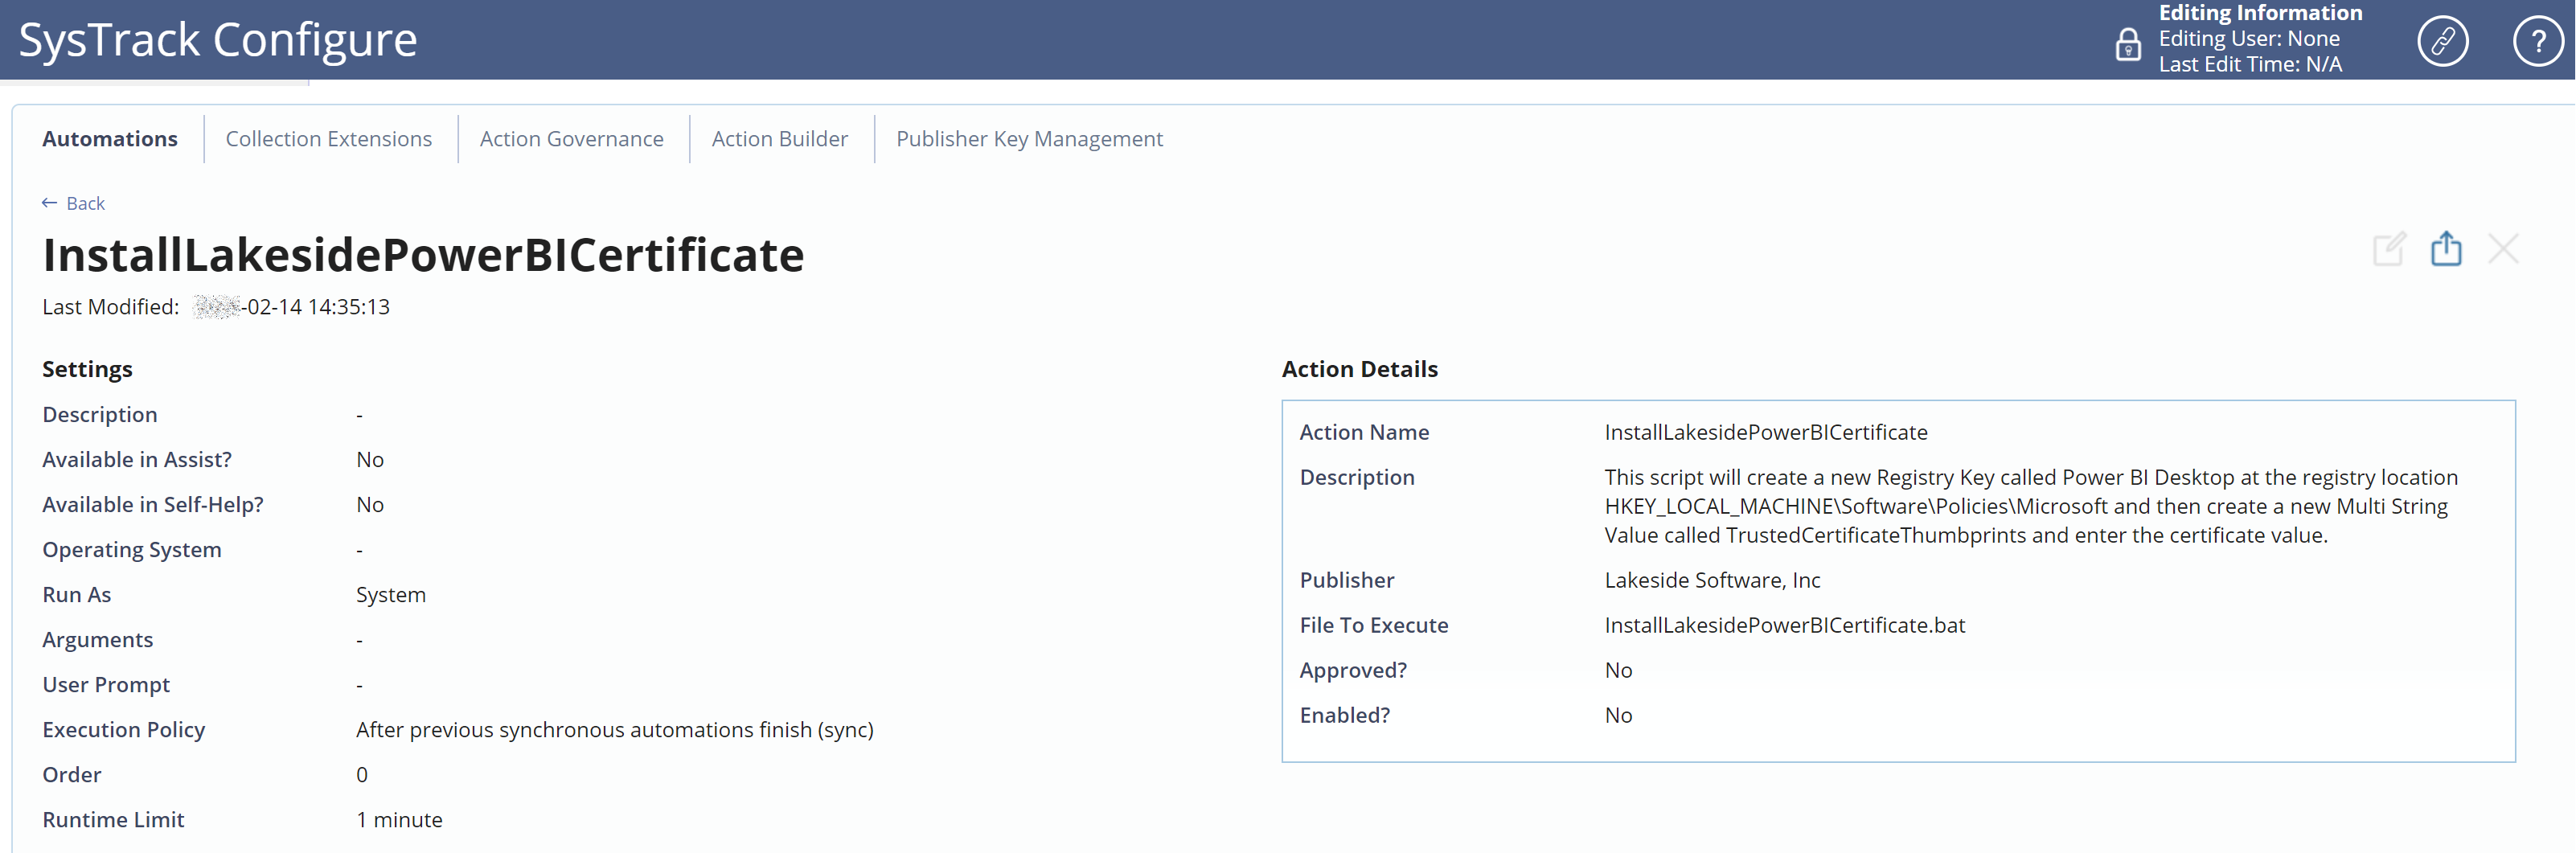
The Kit named SysTrack PowerBI includes an automation named InstallLakesidePowerBICertificate. You can find and configure the automation in SysTrack Configure.
Before you can run the automation, follow these steps:
-
At Configure > Automations and Collection Extensions > Automations (tab), edit the Automation. Select the operating system you want in the Operating System field.
-
At Configure > Automations and Collection Extensions > Action Governance (tab), select the Automation. Then Approve and Enable it.
The Automation must be Approved and Enabled before you can use it. To check whether it has been approved, select the Automations tab, and look at the Approved? and Enabled? fields (under Action Details).
-
In the Description field, add a Description (which is optional) to remind everyone of this automation's purpose.
When you are ready to run the automation for the Connector, you can run the automation with one of these methods:
When you run the InstallLakesidePowerBICertificate automation, it installs the Lakeside Signed Certificate.
After you run the automation, you are ready to install the Custom Connector PQX in the following section. Then you can use the connector in Power BI.
If you prefer to manually install the Lakeside Signed Certificate, you can follow these steps.
Install the Custom Connector PQX
In your documents folder, you should see the path Power BI Desktop > Custom Connectors.
-
If the folder does not exist, create it.

-
Copy the LakesidePowerBIConnector.pqx into the Custom Connectors folder.
C:\Users\<YourUsername>\Documents\Power BI Desktop\Custom Connectors
Or if the Documents folder is part of your OneDrive path, the path could be:
C:\Users\<YourUsername>\OneDrive\Documents\Power BI Desktop\Custom Connectors
Ensure that your Custom Connectors folder is synced and available offline.
Manually Install the Lakeside Signed Certificate
If you prefer to install the Certificate manually, you can use the following steps.
IMPORTANT: The best practice is to run the InstallLakesidePowerBICertificate automation, which completes the following steps for you.
-
Install Power BI Desktop based on your processor type.
-
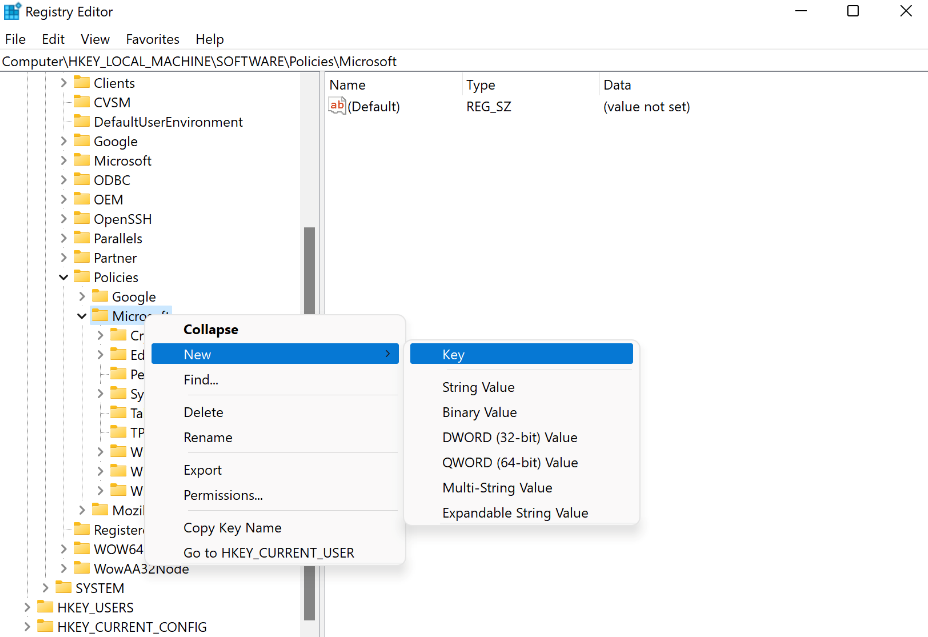
To add the certificate thumbprint to the registry, go to HKEY_LOCAL_MACHINE\Software\Policies\Microsoft\Power BI Desktop.
-
If the folder does not exist, right-click the Microsoft folder and select New > Key.
-
Name the folder Power BI Desktop.
-
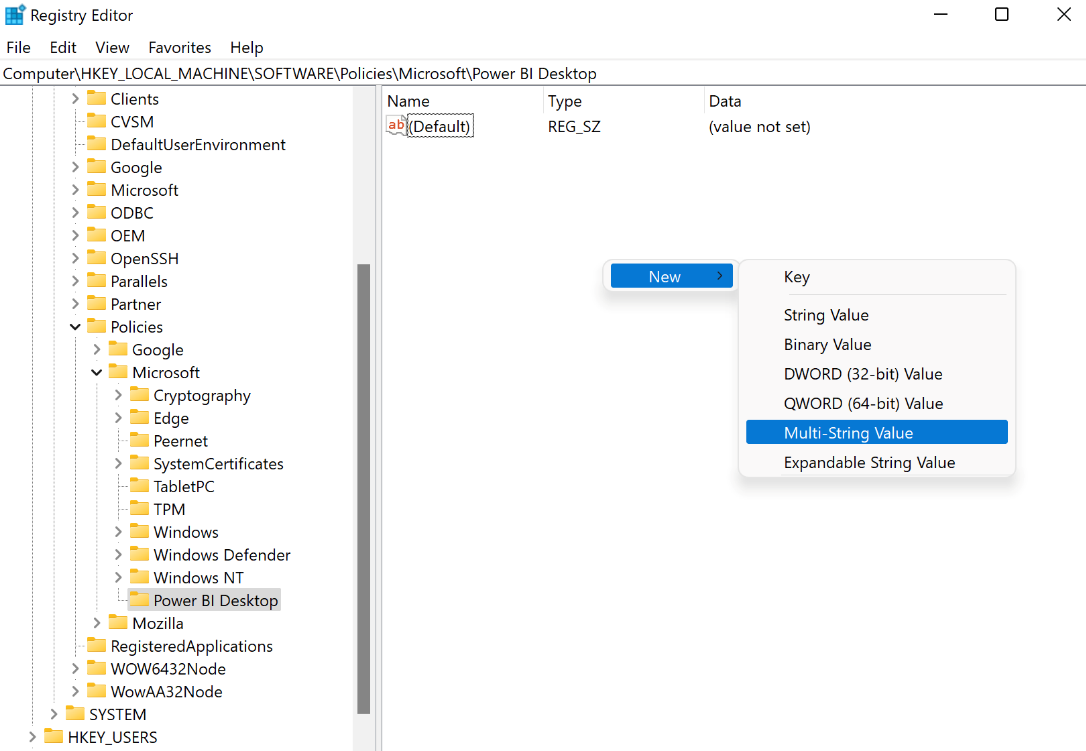
If the Power BI Desktop folder does exist, select New > Multi-String Value.
-
Select REG_MULTI_SZ, and name it TrustedCertificateThumbprints.
-
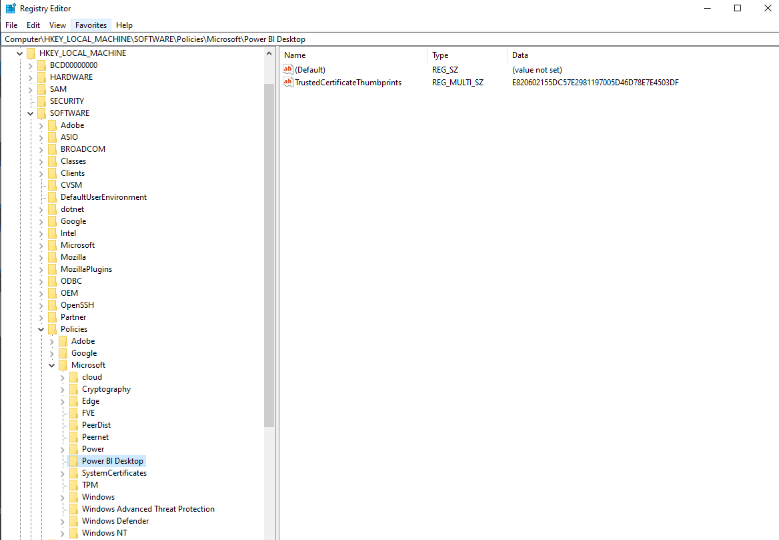
Enter the thumbprint: E820602155DC57E2981197005D46D78E7E4503DF
-
You might get the following warning:

-
If you have entered the thumbprint correctly (with no blank line after it), click OK.
On This Page